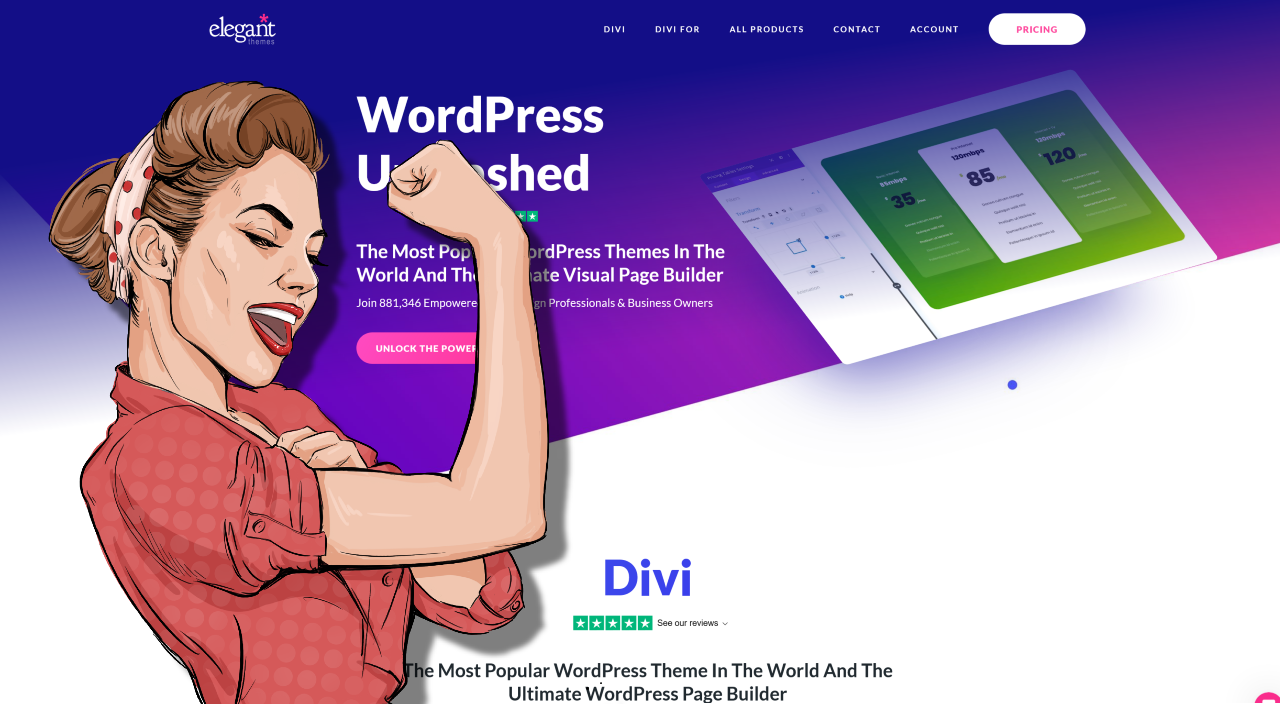
Crafting a visually stunning website is no easy feat, but with Divi WordPress Theme, the process becomes significantly more manageable. This powerful tool, with its myriad features and capabilities, has turned many a design dream into a digital reality.
Now, it’s time to delve deeper and uncover the hidden gems in this theme – the little-known hacks that could revolutionize your website design process. This post will reveal 10 must-try Divi WordPress Theme hacks, each primed to supercharge your website’s aesthetic appeal and functionality.
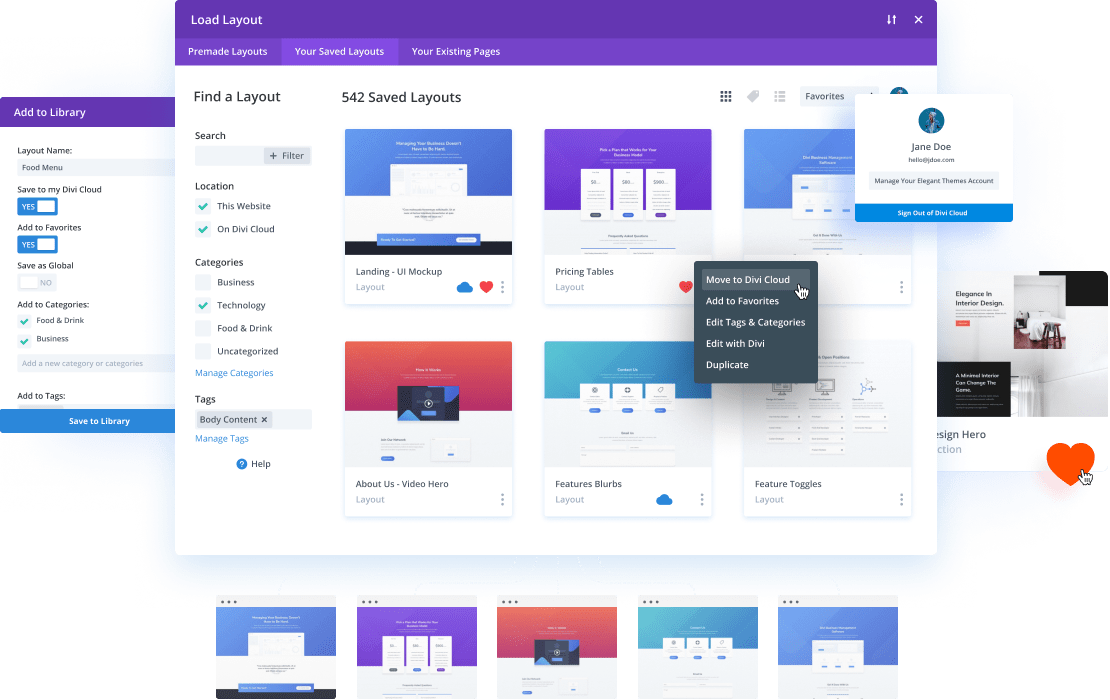
So, be prepared to explore the heights of creative web design, and take your Divi WordPress Theme skills to the next level!
Hack #1: Customizing Divi Header and Navigation
Introduction
In this section, I will show you three exciting hacks to customize the header and navigation of your Divi WordPress theme. By implementing these hacks, you will be able to enhance the design and functionality of your website.
Let’s dive in!
Changing the Menu Style
One way to personalize your Divi header is by changing the menu style. Divi offers various menu styles to choose from, allowing you to match your website’s overall aesthetic. Whether you prefer a classic horizontal menu or a sleek vertical menu, Divi has got you covered.
To change the menu style, simply navigate to the Divi Theme Options in your WordPress dashboard. From there, you can access the Header & Navigation settings. Here, you will find a range of menu style options to select from. Experiment with different styles until you find the one that perfectly complements your website’s design.
Adding a Sticky Header
Having a sticky header can greatly enhance the user experience of your website. A sticky header remains fixed at the top of the page, even as the user scrolls down, ensuring easy navigation at all times. With Divi, adding a sticky header is a breeze.
To enable a sticky header, go to the Divi Theme Customizer. Under the Header & Navigation settings, you will find an option to enable the sticky header. Simply toggle it on, and your header will stay visible and accessible to visitors as they explore your website.
Creating a Hamburger Menu
A hamburger menu is a popular design trend that allows you to declutter your header and provide a cleaner user interface. With Divi, you can easily create a hamburger menu for your website.
To create a hamburger menu, navigate to the Header & Navigation settings in the Divi Theme Customizer. Here, you will find an option to enable the mobile menu. Once enabled, Divi will automatically convert your primary menu into a sleek and compact hamburger menu for mobile devices.
Implementing these three hacks allows you to customize your Divi header and navigation to suit your unique website design. Experiment with different styles, enable a sticky header for improved user experience, and embrace the modern hamburger menu trend. With Divi’s flexibility and customization options, the possibilities are endless.
Stay tuned for more exciting Divi WordPress theme hacks in the upcoming sections of this article.
Hack #2 – Optimizing Divi for Speed
This section explores some effective hacks to optimize your Divi WordPress theme for speed. Implementing these techniques can enhance your website’s performance, improve user experience, and even boost your search engine rankings.
Minifying CSS and JavaScript
One of the key factors affecting your website’s loading speed is the size of CSS and JavaScript files. These files contain code that determines the look and functionality of your website, but they can often be quite large. We can remove unnecessary spaces, line breaks, and comments by minifying these files, reducing their overall size and improving load times.
To minify CSS and JavaScript in Divi, you can make use of various plugins or online tools. You can utilize tools like CSSNano or online services like CSS Minifier for CSS. Similarly, you can use tools like UglifyJS or online services like JavaScript Minifier for JavaScript. These tools will automatically compress your code, resulting in smaller file sizes and faster loading times.
Enabling Browser Caching
Browser caching is another technique that can significantly enhance the speed of your Divi website. When a user visits your site, their browser stores certain files, such as CSS, JavaScript, and images, locally on their hard drive. The next time they visit your site, the browser can retrieve these files from the local storage instead of downloading them again, resulting in faster load times.
To enable browser caching in Divi, you can leverage caching plugins like WP Rocket, W3 Total Cache, or WP Super Cache. These plugins allow you to set expiration dates for different types of files, ensuring that they are stored in the user’s browser cache for a specified period.
This can greatly reduce the amount of data that needs to be downloaded, thereby improving your website’s speed.
Compressing Images
Images often contribute to the bulk of a webpage’s size, leading to slower load times. Compressing images without sacrificing quality can significantly reduce the file size and improve your website’s speed.
There are several tools and plugins available to compress images in Divi. Popular plugins like Smush or EWWW Image Optimizer can automatically optimize your images upon upload, ensuring that they are as small as possible without compromising visual quality.
Alternatively, you can use online services like TinyPNG or JPEGmini to compress images before uploading them to your website.
Remember, when optimizing images, finding the right balance between size reduction and maintaining visual appeal is crucial. Experiment with different compression levels to strike the perfect balance for your website.
By implementing these Divi WordPress theme hacks, you can optimize your website for speed, delivering a faster and more seamless experience to your visitors. So go ahead and give them a try – your website and users will thank you for it!
Hack #3 – Enhancing Divi Layouts and Modules
This section will explore some exciting ways to enhance your Divi layouts and modules, allowing you to take your website design to the next level. You can create a truly unique and captivating website by customizing layouts, utilizing advanced design settings, and adding custom CSS to modules.
Creating Custom Layouts
One of the great features of Divi is the ability to create custom layouts that suit your specific needs. With the Divi Builder, you have complete control over the design and structure of your pages. You can choose from a wide range of pre-designed layouts or start from scratch and build your own. This flexibility allows you to tailor your website’s appearance to match your brand and style.
When creating custom layouts, you can easily drag and drop different modules to add functionality and design elements to your pages. Whether you want to showcase your portfolio, highlight your services, or display your blog posts, Divi offers a variety of modules to choose from.
You can customize each module, from text and image modules to slides and contact forms, to fit your content and design requirements.
Using Advanced Design Settings
Divi provides advanced design settings that allow you to fine-tune the appearance of your layouts and modules. These settings let you control your website’s colors, fonts, spacing, and other design aspects. You can create a visually stunning website with just a few clicks that reflect your unique style and brand identity.
For example, you can easily change a section’s background color or image, adjust the spacing between elements, or add custom CSS classes to modules for further customization. Divi’s intuitive interface makes it simple for anyone without coding experience to make these design tweaks and create a professional-looking website.
Adding Custom CSS to Modules
If you want to take your customization even further, you can add custom CSS to individual modules. This allows you to override the default styles and add your own customizations. By targeting specific classes or IDs, you can modify the appearance of modules to match your desired design.
Adding custom CSS to modules gives you the freedom to create unique and eye-catching designs that the default options provided by Divi do not limit. You can experiment with different styles, animations, and effects to make your website stand out from the crowd. Whether you’re a beginner or an experienced designer, Divi’s flexibility allows you to unleash your creativity and create a website that truly represents your brand.
Enhancing Divi layouts and modules is a powerful way to supercharge your website design. By creating custom layouts, utilizing advanced design settings, and adding custom CSS to modules, you can create a visually stunning website that is unique and tailored to your brand. With Divi’s intuitive interface and extensive customization options, the possibilities are endless.
So go ahead and unleash your creativity with Divi!
Hack #4 – Implementing Advanced Typography
Typography plays a crucial role in website design, setting the tone and enhancing the overall user experience. In this section, we will explore some advanced typography hacks that you can implement using the Divi WordPress theme.
Using Custom Fonts
One way to elevate your website’s design is by using custom fonts. Divi offers a wide range of Google Fonts, allowing you to choose the perfect typography for your website. By selecting fonts that align with your brand’s personality, you can create a unique and visually appealing experience for your visitors.
To use custom fonts in Divi, simply navigate to the Theme Customizer and select the “Typography” option. From there, you can explore the extensive library of Google Fonts and choose the ones that best represent your brand.
Adjusting Letter Spacing and Line Height
Another typography hack to consider is adjusting the letter spacing and line height. These settings can significantly impact your website’s text’s readability and visual appeal.
Divi provides easy-to-use controls for adjusting letter spacing and line height. Increasing the letter spacing can create a more modern and spacious look, while decreasing it can result in a more compact and elegant design. Similarly, adjusting the line height allows you to strike the right balance between readability and aesthetics.
Experiment with different combinations and find the perfect balance that suits your website’s design and content.
Applying Text Effects
Adding text effects can add flair and visual interest to your website’s typography. Divi offers a range of text effects that you can apply to headings, subheadings, or any other text element.
Some popular text effects include drop shadows, text shadows, and gradients. These effects can help make your text stand out and create a memorable visual impact.
To apply text effects in Divi, simply select the desired text element and navigate to the “Design” tab. From there, you can explore the various text effect options and customize them to match your website’s design aesthetic.
By implementing these advanced typography hacks, you can take your website design to the next level and create a visually stunning and engaging user experience.
Stay tuned for more Divi WordPress theme hacks in the upcoming sections!
Hack #5 – Integrating Third-Party Plugins
In today’s digital age, building a website is not just about aesthetics but also about functionality. The Divi WordPress theme allows you to take your website design to the next level by incorporating various third-party plugins. This section will explore three must-try hacks for integrating third-party plugins with Divi to supercharge your website design.
Adding an eCommerce Store with WooCommerce
If you’re looking to transform your website into an online store, WooCommerce is your go-to plugin. With its user-friendly interface and extensive features, WooCommerce allows you to sell products and services effortlessly. Integrating WooCommerce with Divi is a breeze, thanks to the theme’s compatibility and built-in support.
By combining Divi’s visually stunning design capabilities with WooCommerce’s powerful eCommerce functionality, you can create a seamless and professional online shopping experience for your customers.
Whether you’re selling physical products, digital downloads, or even subscriptions, the Divi and WooCommerce integration will help you showcase your products in a visually appealing way, making it easier for customers to make purchases.
Implementing SEO Optimization with Yoast
When it comes to search engine optimization (SEO), Yoast is a household name among WordPress users. This powerful plugin offers comprehensive tools to optimize your website’s content and improve its visibility in search engine results. The good news is that Divi seamlessly integrates with Yoast, allowing you to easily enhance your website’s SEO performance.
Yoast with Divi can easily optimize your meta tags, titles, and descriptions for each page or post. Yoast also provides valuable insights and suggestions to help you improve your content readability and keyword optimization. With Divi’s intuitive interface and Yoast’s SEO expertise, you can ensure that your website ranks higher in search engine results and attracts more organic traffic.
Incorporating Social Media Sharing with Share Buttons
In today’s social media-driven world, it’s essential to make it easy for your website visitors to share your content across various platforms. That’s where social media sharing plugins, like Share Buttons, come into play. By integrating Share Buttons with Divi, you can encourage your audience to share your content, increasing its reach and engagement.
With Divi’s drag-and-drop builder and Share Buttons’ customizable options, you can effortlessly add social media sharing buttons to your website. Divi’s seamless integration with Share Buttons makes it a breeze if you want to include buttons for Facebook, Twitter, Instagram, or any other platform. By making your content shareable, you can amplify its visibility and drive more traffic to your website.
By incorporating these three third-party plugins—WooCommerce, Yoast, and Share Buttons, you can enhance the functionality and performance of your Divi WordPress website. From setting up an eCommerce store to optimizing your content for search engines and encouraging social media sharing, these hacks will supercharge your website design and take it to new heights.
Give them a try and unlock the full potential of your Divi-powered website today!
Hack #6 – Personalizing Divi’s Blog Module
In this section, we’ll explore how you can personalize Divi’s Blog Module to create a unique and engaging blog layout for your website. You can enhance the overall design, showcase author bios, include social media links, and even implement related posts by making a few tweaks and additions.
Changing the Blog Layout
One of the great features of Divi is its flexibility when it comes to customizing the layout of your blog. You can experiment with different column layouts, adjust the width and spacing, and even choose from various post-display styles. By playing around with these options, you can create a blog layout that perfectly aligns with your brand and content.
For example, you can opt for a classic grid-style layout to showcase your blog posts in an organized and visually appealing manner. Alternatively, you might prefer a masonry layout, displaying posts in a staggered grid, creating a dynamic and modern look. With Divi, the endless possibilities allow you to personalize your blog’s design truly.
Adding Author Bios and Social Media Links
Personalizing your blog goes beyond just the layout. Adding author bios and social media links can create a more intimate and connected experience for your readers. Divi makes it easy to include author information alongside each blog post, allowing your audience to get to know the individuals behind the content.
You can showcase each author’s biography, expertise, and any other relevant information that helps establish credibility and trust. Additionally, Divi enables you to include social media links for each author, providing a seamless way for readers to connect with them on various platforms.
Implementing Related Posts
Another way to enhance the user experience on your blog is by implementing related posts. Divi’s Blog Module allows you to display related posts at the end of each blog post, providing additional content recommendations to your readers. This not only keeps them engaged on your site for longer but also helps increase page views and reduce bounce rates.
By analyzing the content of your blog posts, Divi intelligently selects related posts that are most likely to interest your readers. This feature helps create a cohesive and interconnected browsing experience, encouraging visitors to explore more of your content and stay on your site.
With Divi’s powerful customization options, you can effortlessly personalize the Blog Module to match your branding, showcase author bios, include social media links, and implement related posts. By taking advantage of these hacks, you’ll supercharge your website design and create a unique and engaging blog experience for your audience.
Now that we’ve explored the sixth hack let’s move on to the next section and discover more ways to maximize the potential of Divi’s WordPress theme. Stay tuned!
Hack #7 – Creating Interactive Divi Galleries
When it comes to creating stunning website designs, the Divi WordPress theme is a game-changer. And one of the ways you can take your website design to the next level is by using interactive Divi galleries. In this section, we’ll explore three hacks that will supercharge your Divi galleries and make them more engaging for your visitors.
Using Masonry Grid Layout
The first hack we’ll discuss is using the Masonry grid layout for your Divi galleries. This layout style is perfect for showcasing images in a visually appealing and dynamic way. Instead of the traditional grid layout, where all the images have the same size, the Masonry grid layout allows you to create a more fluid and asymmetrical design.
By enabling the Masonry grid layout in your Divi galleries, you can automatically adjust the size and position of each image to create a captivating and unique gallery. This will give your website a modern and trendy look, making it stand out from the crowd.
Adding Lightbox Effects
Another way to make your Divi galleries interactive is by adding lightbox effects. A lightbox effect is a popular feature that allows users to view images in a larger size without leaving the current page. When a user clicks on an image in your Divi gallery, it will open up in a lightbox overlay, providing a focused and immersive viewing experience.
With Divi, adding lightbox effects to your galleries is a breeze. Simply enable the lightbox option in the gallery module settings, and your images will automatically open in a sleek and stylish lightbox when clicked.
This enhances the user experience and gives your website a professional and polished look.
Implementing Image Filters
Lastly, you can implement image filters to make your Divi galleries even more visually engaging. Image filters allow you to apply various effects to your images, such as black and white, sepia, vintage, or any other artistic filter that matches your website’s style and branding.
By applying image filters to your Divi galleries, you can create a cohesive and aesthetically pleasing look for your website. This adds a touch of creativity and helps evoke certain emotions and create a memorable experience for your visitors.
Creating interactive Divi galleries is a fantastic way to supercharge your website design. By using the Masonry grid layout, adding lightbox effects, and implementing image filters, you can create visually stunning and engaging galleries that will leave a lasting impression on your visitors. So go ahead, unleash your creativity, and take your Divi galleries to the next level!
Hack #8 – Optimizing Divi for Mobile Devices
In today’s digital age, websites need to be mobile-friendly. With more and more people accessing the internet through their smartphones and tablets, optimizing your website for mobile devices is a must.
This section will explore some Divi WordPress theme hacks that will help you make your website responsive, hide elements on mobile, and adjust font sizes for the mobile view.
Making the Website Responsive
A responsive website is one that adapts to different screen sizes, ensuring that your content looks great on any device. Luckily, the Divi theme makes it easy to create a responsive website without any coding knowledge. To make your website responsive, follow these simple steps:
- Navigate to the “Page Settings” panel in the Divi Builder.
- Under the “Layout” tab, click on “Responsive Editing.”
- Enable the “Make This Row/Section Fullwidth” option for each row or section you want to be responsive.
- Adjust the content and layout of each row or section to ensure it looks good on different screen sizes.
By making your website responsive, you are providing a seamless user experience across all devices, which can lead to increased engagement and conversions.
Hiding Elements on Mobile
Sometimes, certain elements of your website might not be necessary or visually appealing on mobile devices. In such cases, hiding these elements to improve the overall mobile experience is a good idea. Divi allows you to easily hide elements on mobile using the built-in responsive editing feature. Here’s how you can do it:
- Select the element you want to hide on mobile.
- In the settings panel, click on the responsive editing icon (the one with three horizontal lines).
- Enable the “Hide on Phone” option.
This simple hack ensures that your website looks clean and clutter-free on mobile devices, enhancing the user experience.
Adjusting Font Sizes for Mobile View
Font sizes play a crucial role in the readability of your website on mobile devices. You can adjust the font sizes specifically for the mobile view to ensure that your text is legible and visually appealing on smaller screens. Follow these steps to customize font sizes for mobile in Divi:
- Select the text element whose font size you want to modify.
- In the settings panel, click on the responsive editing icon.
- Enable the “Font Size” option.
- Adjust the font size slider to your desired size for mobile devices.
By optimizing the font sizes for mobile, you can create a more user-friendly browsing experience, preventing users from zooming in or squinting to read your content.
Optimizing your Divi WordPress theme for mobile devices is essential in today’s mobile-first world. By making your website responsive, hiding unnecessary elements, and adjusting font sizes, you can ensure a seamless and enjoyable mobile browsing experience for your users. Implement these hacks, and watch your website design supercharges with mobile optimization.
Hack #9 – Implementing Advanced SEO Techniques
Introduction
In today’s digital landscape, having a visually appealing website is essential, but ensuring that your website is optimized for search engines is equally important. By implementing advanced SEO techniques, you can increase your website’s visibility and attract more organic traffic. This section will explore three key techniques: optimizing meta tags and descriptions, setting up SEO-friendly URLs, and submitting an XML sitemap to search engines.
Optimizing Meta Tags and Descriptions
Meta tags and descriptions are crucial in telling search engines what your web pages are about. By optimizing these elements, you can improve your website’s search engine rankings and attract more targeted visitors. Here are a few tips to help you optimize your meta tags and descriptions:
- Choose relevant keywords: Research and select keywords that accurately reflect the content of your web page. Incorporate these keywords naturally into your meta tags and descriptions.
- Make it concise: Keep your meta tags and descriptions concise and to the point. Aim for a maximum of 160 characters for meta descriptions and 70 characters for meta titles.
- Include a call to action: Use action-oriented language to encourage users to click through to your website. For example, “Discover the best tips for optimizing meta tags” or “Unlock the secrets of effective SEO techniques.”
Setting Up SEO-Friendly URLs
Having SEO-friendly URLs can significantly impact your website’s search engine rankings. Follow these best practices to ensure your URLs are optimized:
- Use relevant keywords: Incorporate relevant keywords into your URL structure to provide search engines with additional information about your web page’s content. For example, instead of using “www.example.com/page1,” use “www.example.com/seo-techniques-page1.”
- Keep it concise: Short URLs are more user-friendly and easier to remember. Avoid using long and complex URLs that can confuse both search engines and users.
- Use hyphens: Separate words in your URLs using hyphens instead of underscores or other special characters. This makes it easier for search engines to read and interpret the words in your URL.
Submitting XML Sitemap to Search Engines
Submitting an XML sitemap to search engines helps them understand the structure of your website and index your web pages more efficiently. Here’s how you can do it:
- Generate an XML sitemap: Use a reliable SEO plugin or an online XML sitemap generator to create a sitemap for your website. Make sure it includes all the relevant pages.
- Submit to search engines: Sign up for the respective search engine’s webmaster tools, such as Google Search Console or Bing Webmaster Tools. Follow their guidelines to submit your XML sitemap. This allows search engines to crawl and index your web pages more effectively.
- Regularly update your sitemap: Whenever you make changes to your website’s structure or add new pages, update your XML sitemap and resubmit it to search engines. This ensures that search engines have the latest information about your website.
Implementing these advanced SEO techniques can give your website a competitive edge in search engine rankings. By optimizing your meta tags and descriptions, setting up SEO-friendly URLs, and submitting an XML sitemap to search engines, you’ll be on your way to supercharging your website’s design and attracting more organic traffic. Stay tuned for the next section, where we’ll explore another exciting Divi WordPress theme hack!
Hack #10 – Boosting Website Performance with Caching
In today’s fast-paced digital world, website performance plays a crucial role in user experience and search engine rankings. Slow-loading websites can drive away visitors, leading to high bounce rates and low conversions. Thankfully, there’s a simple yet powerful solution to improve your website’s performance: caching.
Installing a Caching Plugin
You’ll need to install a caching plugin to start supercharging your website’s speed. Several reliable options are available, such as WP Rocket, W3 Total Cache, and WP Super Cache. These plugins create static HTML versions of your web pages, which are then served to visitors instead of dynamically generating the page content every time.
Once you’ve chosen a caching plugin, follow these steps to install it:
- Log in to your WordPress dashboard.
- Navigate to the “Plugins” section and click on “Add New.”
- In the search bar, type the name of the caching plugin you’ve chosen.
- Click on “Install Now” next to the plugin’s name.
- After installation, click on “Activate” to enable the caching plugin.
Configuring Cache Settings
After activating the caching plugin, it’s essential to configure the cache settings correctly. Each caching plugin may have a different interface, but the general principles remain the same. Here are some key settings to consider:
- Page Caching: Enable page caching to generate static HTML versions of your web pages.
- Browser Caching: Enable browser caching to store static assets (such as images, CSS, and JavaScript files) in visitors’ browsers. This allows subsequent visits to your website to load faster.
- Minification: Enable minification of CSS and JavaScript files to reduce their file sizes, optimizing load times.
- Gzip Compression: Enable Gzip compression to compress your website’s files, reducing their size during transmission.
- Exclusion Rules: Exclude certain pages or sections of your website from being cached, such as shopping carts or dynamic content.
Take the time to explore the caching plugin’s settings and documentation to ensure you’re making the most of its features. Each website is unique, so test different configurations to find what works best for your specific needs.
Testing Website Speed
Once you’ve installed and configured the caching plugin, testing your website’s speed is crucial to ensure the caching is working effectively. Several tools can help you with this, such as Google PageSpeed Insights, GTmetrix, or Pingdom.
When testing your website’s speed, pay attention to the following metrics:
- Page Load Time: The time it takes for your webpage to load fully.
- Time to First Byte (TTFB): The time it takes for the server to respond to a request.
- Render Blocking Resources: Identify and minimize any CSS or JavaScript files that may be blocking the rendering of your webpage.
By regularly testing your website’s speed, you can track the improvements achieved through caching and make any necessary adjustments to optimize your website’s performance further.
Caching is a must-try hack to supercharge your website’s design. Installing a caching plugin, configuring cache settings, and regularly testing your website’s speed can significantly improve its performance, providing visitors with a fast and seamless browsing experience. Don’t let slow-loading web pages hinder your website’s success. Implement caching today and take your website design to new heights.
Conclusion
The Divi WordPress theme is a powerful tool that can greatly enhance your website design. By implementing these 10 must-try Divi WordPress theme hacks, you can take your website to the next level and supercharge its design.
Divi offers endless possibilities for creating a stunning and user-friendly website, from customizing your header and footer to creating unique page layouts. By utilizing these hacks, you can maximize the potential of Divi and create a website that stands out from the crowd.
Always remember to test your changes and make backups before implementing these hacks. And don’t be afraid to experiment and try new things – that makes Divi great!
So go ahead, give these hacks a try and see the difference they can make in your website design. Your visitors will thank you for it, and you’ll be on your way to creating a truly exceptional online presence. Happy designing!


