In this tutorial, you will learn how to turn a daylight photo into a nightshot, in just a few easy steps. Photoshop has several functions for editing photos. By working with layers you are able to create images that are realistic as it is created. The video below explains step by step how you convert a day photo into a night photo, using layers.
The explanation starts with two photos side by side: A photo taken during the day and a photo at night with a full moon. The first step is to select and remove the day of air. Then place the night photo. To really make the photo look like it was taken in the dark, make a layer that is darker. In the end, you get a realistic result.
I get a lot of emails from beginners who want to learn the advanced tutorials that involve glow and sparkles effects, yet they are not very familiar with the pen tool and other tools that require a little bit of experience and knowledge, even if these tools seem basic to most of you. So, I decided to put up a tutorial that will allow beginners who are not yet familiar with Photoshop, to get started, make sparkles, glow and twirls without mastering the pen tools skills any deeper.
We will be making this tutorial, which will only be constructed from 3 images, 1 shape and a lot of basic Photoshop commands that will allow us to make a really cool composition… or shall I say — “hot”..? Please feel free to leave a comment or submit your result to our Flickr group.
How to Turn a daylight photo into a Night Shot – Step 1:
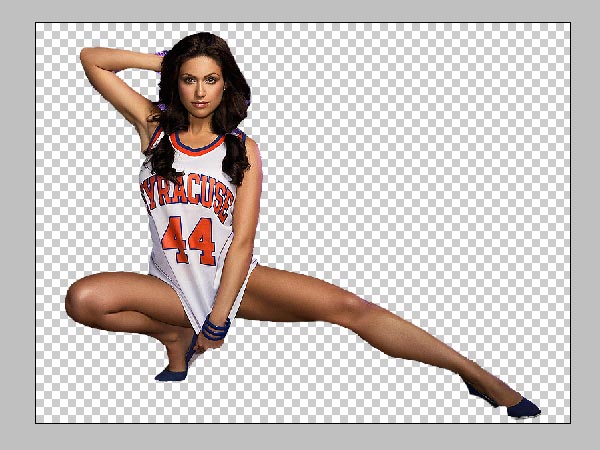
Crop the girl out of the image; it does not really matter hat method you use to chop the edges and background away, as long as you have the edges defined. We are not going to get into great details here as cropping is an ultra basic technique, all I’d say is that I used the Magnetic Lasso Tool to roughly extract the lady from the background. Don’t worry about the rough edges if you have any, we will be using a lot of filters so any mishaps will disappear later on.
How to Turn a daylight photo into a Night Shot – Step 2:
Place the lady over the winter landscape and desize, according to your needs. We scaled the image down to about 60% and placed it in the middle of the canvas.

How to Turn a daylight photo into a Night Shot – Step 3
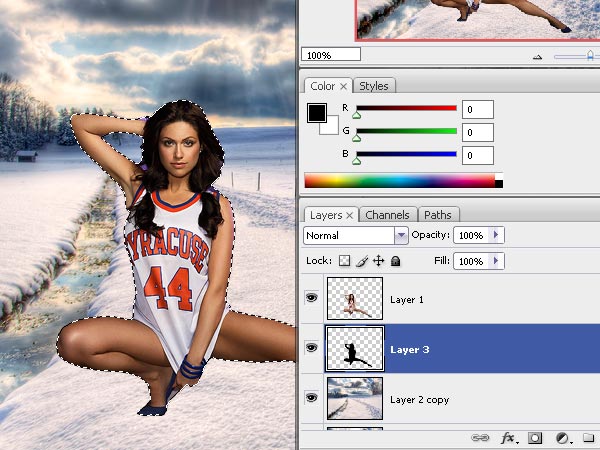
Now we need to make the girl’s image look like it’s blending in organically, and the easiest way to do so is to add a shadow that falls on the snow. Select the woman’s layer, and once you made the selection, create a New Layer underneath the girl’s image layer, and fill that selection with solid black color #000000.
Step 4
Now we are going to transform the selection, while the layer is still selected, press Ctrl + T and lay the shadow down, just the way you see in the illustration. Make sure that the shadow begins from lady’s legs, because when you start transforming, the shadow will move from under her legs and the only way to fix this is by dragging the bottom corners and adjusting them to “fit” to the main object.
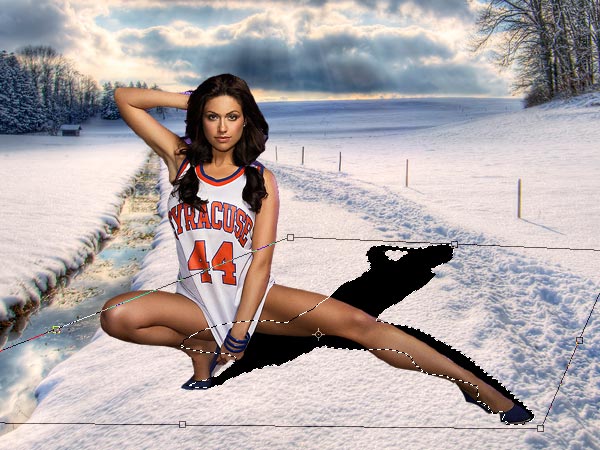
Applied the shadow? Pressed “Enter”? Great, now Go to Filter >> Blur >> Gaussian Blur and apply mild blur — remember that shadows can never really be sharp.
Reduce the opacity of the shadow and set the blending mode to “Multiply”.
Step 6
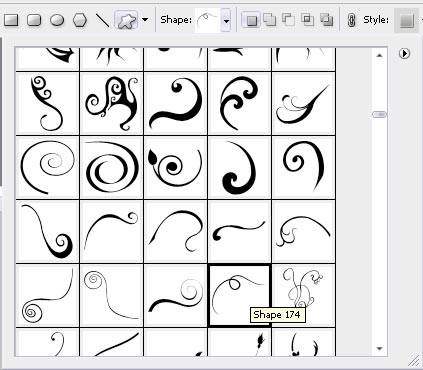
Next, we are going to add these little twirls. Now the most common problem most beginner Photoshop users encounter is that in order to draw these twirly lines you need to have a great deal of experience with Photoshop. We are going to use Twirly shapes which you can download here.
Select any of them which you like most and using any color (we are going to overwrite these settings later) draw the shape.
Press Ctrl + T to transform the shape so that it will have more depth, creating the illusion that it “lays” on the flow surrounding the leg.
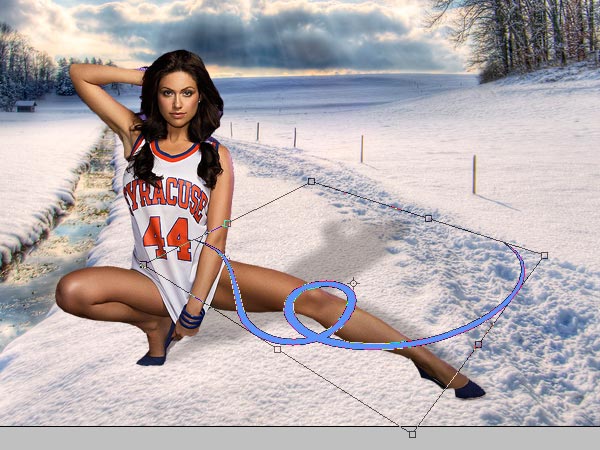
Step 7
The easiest way we are going to do it Resterize the shape.
Then, select the eraser tool and using a brush with a sharp edge, remove the shape from ONE part of the leg. Be sure that you don’t remove from too many places otherwise the illusion of wrapping the leg will disappear..
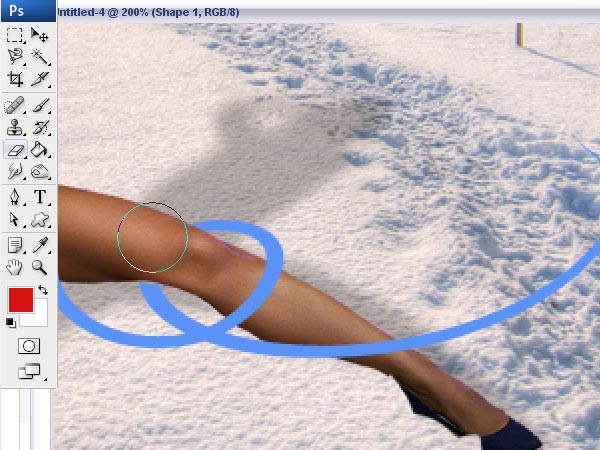
Apply the same steps on the lady’s arm. Don’t worry that the edges of the shapes don’t “meet” — we will complete these steps and add everything we need in next steps.
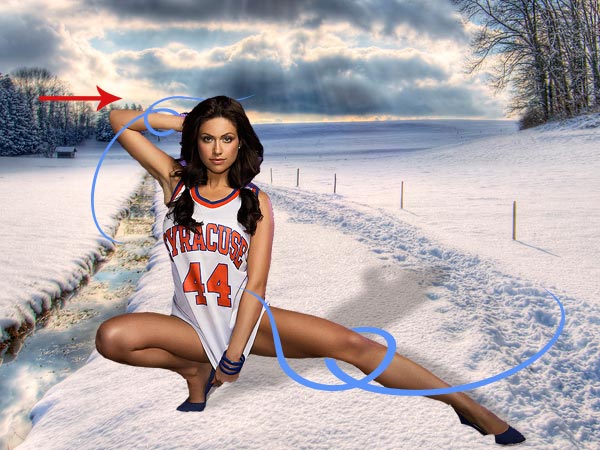
Step 8
Merge both twirl layers and go to Layer Styles, apply the following settings for Outer Glow and Color Overlay with pure white.
This will give your shape a very strong and visible glow.
Step 9
Get back to the background layer (winterscape) and go to Image >> Adjustments >> Exposure. Apply the following settings to reduce the lightness of the image, basically what reducing exposure does is simply making the image darker, while preserving the light spots, which is important in our case.
Step 10.
As you can see, now the background and the main character in our tutorial look way too different, so what we are going to do is — duplicate the lady’s layer and hide one of them for now. We will need it later so do NOT delete it. Using the layer that remained visible, go to Image >> Adjustments >> Match Color.
Match the lady’s color with the background, IN the body of your composition.
You see, not it looks so much more organic and blends in nicely into the low contrast background we currently have.
Step 11
Now we are going to add sparkles to the twirly lines. As I said in the beginners, this tutorial was designed for beginners, so we are going to use the easiest techniques here. Select the brusg tool and go to the brushes interface bu pressing F5.
Apply the following settings to the Brush Presets. Our aim is to create small, chaotically spread dots, that will eventually become sparkles. This is absolutely easy and will require only the very basic Photoshop skills, as long as you follow the right settings for “Scattering“:
Step 12
The next step is to add the sparkles. You can work directly on the layer with twirls, which will save you the work of apply the same Layer Style afterward, however if you are not sure that you will achieve the best result right away, create a new layer and simply draw twirls over the existing ones and around the lady, in places it’s not been done with the shape we used. be sure to add sparkles to places where the cropping was poor, in our case it’s the feet area. Also, it’s a good idea to add sparkles around the hair as it makes the edges look smoother.
Once you have done that, we can move on to overall image effects and moving to the lucky step:
Step 13
Create a new layer. Using #7283a8 as your foreground color and #c3cfd7 as your background, go to
Filter >> Render >> Clouds and create a full layer just filled with mild clouds. Once it’s ready, set its’ blending mode to “Overlay” and reduce the opacity to 80% (or less, if your image turns out too light).

Step 14
Merge the lady’s layer with the background and go to Image >> Adjustments >> Levels, making the whole layer darker and more dramatic, in our example we moved the middle (gray) arrow to 0.38
Step 15
Pick the last remaining image with grass, paste it unto the composition on top of all the other layers and using a big (150+ pixels soft edge brush, remove the remains of the grass leaving it only at the bottom of our collage. beginners always have a hard time cropping grass — it’s indeed a very hard task, but simply using a huge soft eraser tool does pretty much this trick as we don’t see the edges very clearly..
Step 16
Create a new layer and fill it fully with the color #1a346e. Set the blending mode of this layer to “Soft Light”. Make sure that this layer lies on top of ALL the other layers, including the grass as we want to make the composition organically blended, even if it’s not entirely realistic.
Step 17
Adding text to the girl’s leg. Using any font you find fit, but preferably an old looking one like Times New Roman, for example.
We used the font Arno Pro Semi bold.
This is going to be a detailed job. Using a big capital letter, type the first letter of your word and place it over the girl’s leg, making it look like the letter is actually standing on it. Using Ctrl + T transform command to rotate the letters in the right tangle. Your next letter would not be in caps and it will be about 5 pixels less in sixe, just change the size of the font and place your next letter in the same fashion. You may even want to go farther and make the letters look like they lay and fall to the side, by simply overdoing the Ctrl + T command, and rotating the letter too much to the side.

Make sure that each next letter is smaller than the previous one, so that the last one will be significantly smaller than the first.

Apply the following Layer Styles to add the same glow as we did with the twirls and stars / sparkles.

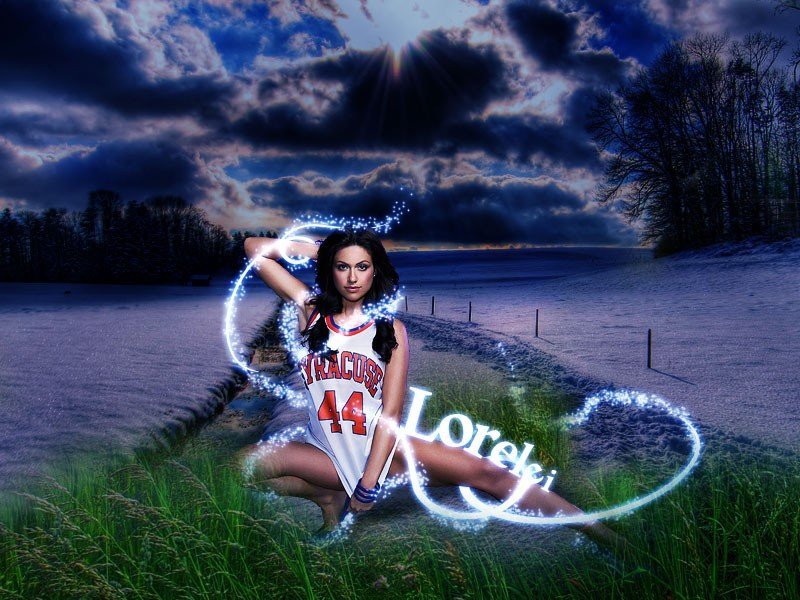
This is what you will get once the Layer Styles have been applied…

Step 18
Last step is going to add a little life to our frosty blue and lifeless composition. Remember that Lady’s layer we duplicated and hid for the time being? Now it’s time to bring it back, siply enable the previous back and without changing its position on the canvas, drag it in the layers palette on top of all the others, this way you will have a much more colorful main character on a cold white background. For your convenience I am adding a list of all the layers and their sequence that you should have on your canvas.

That’s it, here is your result and I hope you enjoyed the tutorial! Please subscribe to our RSS feed by email, to get the full next tuts directly to your inbox.




Hello from Brazil! I’m very interested in your tutorial, but I can’t do it because the links for the first 6 printscreens are broken, so no image appears.
Could it be possible to repair these links? Thank you!
awesome dude, JUST awesome 🙂 I LOVE HOW YOU TEACH US, AND MAKE IT Easy great job Lad !! Can i know what is the difference from this and 2017 cc version if something is very important in this I m planning to get this version what to do??
check out also spotify plays from real people and find out how you can increase telegram members now..